Good preventative maintenance isn’t just for safety, it’s also for maintaining the value of my watercraft and reducing my overall cost of ownership. I feel that the better maintained my boat is the longer it will last and the higher the resale value. If I fix or adjust things when they need it instead of waiting for them to fail or break, that will help keep my ownership costs down.
Since the engine and drive system are one of the most important components I like to start there. It doesn’t matter if it is a straight outboard or an inboard/outboard; the lower unit gets a lot of rough use and needs extra care. Gears grind into reverse from the dock, unseen logs bounce off the skeg and propellers stir up sand to grind at the paint and seals.
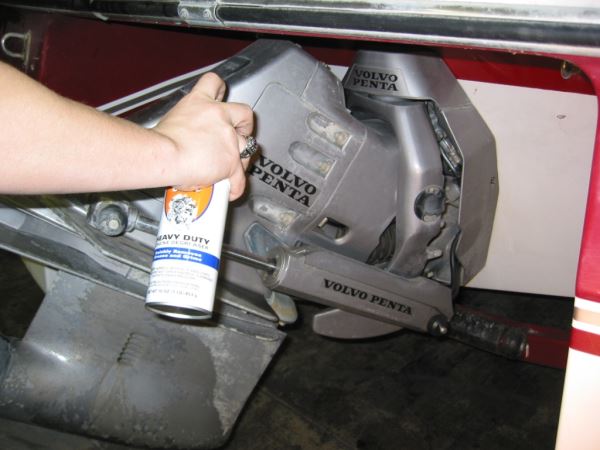
Basic owner maintenance includes touch-up painting, removing the propeller, replacing sacrificial anodes, lubricating and cleaning the tilt mechanism and changing the lower end grease. All of these can be done in a couple of hours with very little experience or special tools.
Start with an overall inspection of the lower unit looking for damage, chips, leakage and make a list of repairs needed. If you have not ordered the anodes or bought the gear case oil, now’s the time to get out the parts and service manual and look up the correct parts. Make sure you complete the oil change and any repairs before any touch up painting.
Oil and water.
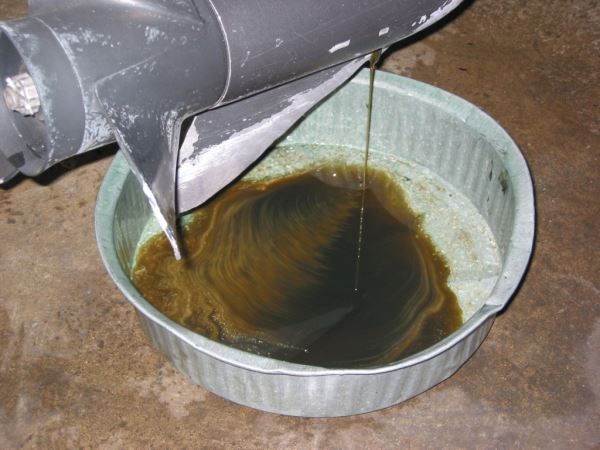 Water is a major concern for lower units. Water will reduce the lubricating properties of the gear lube. promote corrosion of the gears and shaft and ultimately ruin the lower end. Therefore, the first thing to look for is water in the gear case. This requires draining the gear lube into a pan.
Warm oil drains better, but running the engine will mix the lube and any water that might have leaked into the gear case, making it hard to tell the difference. Yes, run the engine to warm up the lube, but make sure that it has been in a full down position for about an hour before checking for moisture. This “rest” time should allow the oil and water to separate and still be warm enough to drain reasonably well.
You will need to locate the drain plug. Use your service manual and make sure you are removing the drain plug and not a clutch or shifting screw. Some lower units have the drain plugs behind the propeller and under the sacrificial anodes. Some plugs are on the side of the lower gear case and some are just ahead of the skeg. At this time also find the vent plug, but don’t remove it just yet. It’s usually located at the top of the lower unit or about halfway up the lower end.
Always use a drain pan to collect the oil. This allows you to see what is draining out of the lower end and collects the oil so it can be disposed of correctly. Initially, do not drain very much oil to look for moisture. Too much oil in the drip pan will cover the moisture and make it difficult to see.
Remove the drain plug. Without the vent plug removed, the oil (and water, if present) should just dribble out. Since water’s viscosity is different than oil’s it will settle to the bottom of the lower end (beneath the oil) and will be the first thing that drains into the oil pan.
Briefly replace the lower plug and inspect the oil in the pan. Are there water bubbles visible? Does the oil look milky or cloudy? If not, it is a good bet there is no water contamination. The oil may look bubbly or cloudy from the sealers used in the repair or the bubbles from recent use. Running will also mix the oil and water and it will not be as readily apparent.
If there are signs of moisture, take the unit to a mechanic and have the shop pressure test the lower unit. Checking with air pressure will help find the leak’s location. But if everything looks good, remove the lower plug and the vent plug and drain the rest of the oil from the gear case.
Most owners will be filling the lower unit with oil from a tube or bottle. Usually one tube will not fill the typical gear case on a larger engine or stern drive. The need for extra oil will require you to have the bottles or tubes ready to use prior to starting the oil change.
Insert the nozzle of the tube or bottle of oil into the bottom drain and start squeezing the lubricant into the lower end of the engine. When the first tube or bottle is empty, place a finger over the vent hole or replace the vent plug. Quickly remove the empty bottle and insert the nozzle of the new bottle. Remove your finger or the vent plug and continue the filling process. Repeat as required until the oil starts to come out of the vent hole. Once it’s full replace the vent, remove the filler nozzle and insert the drain plug. Tighten the drain plug, clean around both plugs and check for leaks. That’s all it takes.
Anodes
This is also a good time to replace any of the sacrificial anodes on the engine. Sacrificial anodes are sacrificed to corrosion, instead of sacrificing some major part of the engine or drive unit. Anodes are not just for use in salt water; they should be used if you are running your boat in fresh water or salt water. It is usually recommended that you have zinc anodes if you are running your boat in saltwater and magnesium anodes if you are operating in fresh water.
The rule of thumb is to replace any anodes that are less than half of their original size.
Make sure you check your owner’s manual and locate all the sacrificial anodes on your boat. Anodes may be located behind the propeller, on the side of the lower unit, or even as a trim tab. Make sure you find them all and if they are more than half gone, replace them.
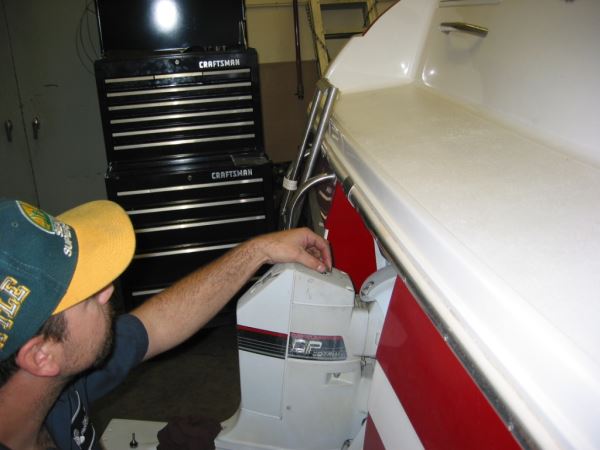
This is also a good time to check the mounting hardware of the lower unit or the outboard. Look at the mounting transom brackets and the bellows units. If there are any signs of damage or dry pivot points (or dried out bellows) you will need to make a few repairs. If it’s the bellows unit on the stern drive, take it to a dealer. If it’s just dry pivots, check the owner’s manual for any specific lubricating grease and grease the pivot points. This will usually take a grease gun to complete.
The transom isn’t part of the lower unit, but this is as good a time as any to check out the inside and outside of the transom. Many transoms are wood laminate covered with fiberglass material. If the fiberglass is damaged or cracking the wood substructure can become water logged. Water logged wood will lower the strength of the transom and add weight to the stern of the boat.
Continue servicing the lower unit by inspecting the steering hydraulic cylinder, power tilt cylinders and any hoses that are attached. It is important that the hydraulic cylinders be very reliable and simple. But they will get corrosion and pitting that can damage the seals and allow them to leak and not maintain position.
Inspect the exterior of the cylinders for corrosion and pitting, the pushrods for pitting and scratches and the seals for leaks. You’ll also want to look at the hoses for cracking, splitting and leaks. Don’t try to patch hydraulic hoses. They are under an extremely high pressure and if they are cracked or leaking they need to be replaced.
The pushrods are usually stainless or chromed material and corrosion will create pits in the surface. These pits will damage the rubber seals allowing the hydraulic fluid to leak out of the system. Easiest way to fix the problem is to apply a good quality metal polish to the pitted areas and smooth them out. You might have to use a fine steel wool along with the polish. If the pits and corrosion are really bad, replace them. Run the tilt after you have cleaned everything up and look for leaks around the pushrods. If the seals leak they will need to be replaced.
Check the skeg for any damage. If it has minor nicks and chips, you can always sand it with sandpaper and apply a coat of primer and paint. If the skeg is bent or is missing large pieces take it to a shop for repair. Lower units can be degreased, sanded and painted with over-the-counter supplies. Use 320 grit sandpaper, an aerosol can of metal primer and another can of paint. Power sanders can take too much material off the lower unit, so it’s best to do the sanding by hand.
Parts like the chrome or stainless pushrods and cable ends, stainless lines, etc., need to be protected from any overspray so cover them with masking tape and paper. If you are painting near the propeller it is wise to remove the propeller and tape the shaft to prevent it from getting overspray.
Small but powerful
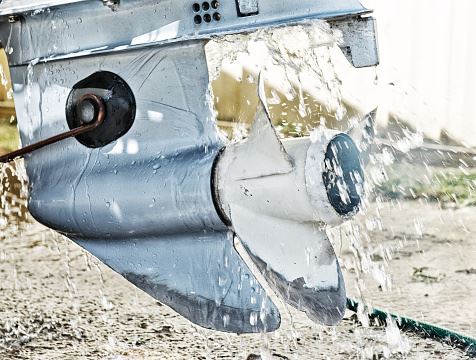 While the propeller is a very small part of the power system on a boat, it is probably one of the most important. If the propeller is damaged, it can damage the rest of the engine. Bent and chipped propellers are also more inefficient which reduces the performance of the boat.
Every time you take the boat out you should take a look at the propeller. Look for nicks, chips, bends or line wrapped around the shaft under the propeller. Any line of rope can damage the seals.
Stainless steel propellers, severely damaged propellers and adjustable pitch propellers should be sent to a specialized propeller repair facility. A qualified shop will be able to repair, refinish and rebalance the propeller for the best performance. Remember, while they have your prop, you will want to run the boat, so always keep a backup propeller around to use.
For aluminum propellers with minor dings, nicks or bends, an owner can do very limited minor cosmetic repairs. The propeller needs to be smooth and in good condition to provide the boat with maximum performance. Nicks and bends reduce the efficiency, so it’s logical to check them after every use and make minor repairs when necessary.
While the propeller is still on the engine is a great time to file any nicks or chips out of the prop. Use a small aluminum file to smooth the damaged area. You do not want to remove a lot of material. All you need to do is smooth the area so there are not sharp or jagged edges.
Also, you should periodically remove the propeller and apply a film of grease to the propeller shaft and at the same time check the seals and remove any fishing line that might be tangled around the shaft.
This might sound like a lot of work, but the oil change, greasing, painting and prop repair can often be done in an afternoon or evening (about three or four hours). When it’s all done, it’s time to go boating.
Checklist
- Inspect the lower unit for chips, leakage, anode and propeller.
- Make sure lower unit is in the down position for at least ½ hour before draining gear lube.
- Remove bottom drain plug first, the slower draining makes it easy to inspect the used lubricant.
- Remove the top drain plug.
- Fill with correct gear lube from the bottom up.
- Replace top drain plug when lube overfills then replace lower plug quickly.
- Remove propeller and check for fishing line, wire or other items that will damage the seal around the prop shaft.
- Repair or replace propeller as needed. If it’s painted, rough the surface with sand paper or abrasive cloth, clean with thinner or acetone to remove grease and repaint propeller before installation.
- Remove or sand off corrosion and scratches on the lower unit. Clean with thinner or acetone and repaint with appropriate paint. Some minor corrosion can be removed with an abrasive cloth and a cola product.
- Lubricate the tilt hinge and clean the polished struts on the hydraulic tilt unit. Dirt and scratches can damage the seals in the hydraulic cylinders. If you don’t have a high quality metal polish you can always use a little Crest toothpaste.
About The Author
Scott “Sky” Smith is the author of “Ultimate Boat Maintenance Projects” and an independent agent insuring boats, custom vehicles, drones and aircraft nationwide. Sky@SkySmith.com. Follow on Twitter @scottskysmith.