The past few months have been pretty interesting for me. I have attended boat shows, air shows and drone shows. I have been able to talk to people from Florida to Seattle about their boats, what they like in a boat and what they do with them. Plus, I get to talk to the owners about how they maintain the boats. Of course, some locations never really need to store their boats over the winter. But for those of us that have a lay up period, it is a good time to talk about the cleaning preparation schedule. When it comes to getting ready for the season, Pontoon and Deckboat magazine has done very well covering all those topics, so I don’t want to spend a lot of time on that issue.
Third Pontoon Kit
As far as my boat, I think I mentioned last time that I was getting ready to install the third pontoon kit from Pontoon Wholesalers. Because of my schedule and the weather, it’s going to be happening soon. I hope it will be all done by the time you read this column and I’ll have the results next time.
For those that question my boat sanity, I need to clarify what happened. I bought my ‘toon based on my own buying recommendations. I still believe you should buy a boat that meets your individual needs most of the time which is based on use, location, type of operator, and cost of operation. I didn’t need a third ‘toon; I didn’t buy a boat with three ‘toons. I have been very happy with the 20-foot Bentley Cruise 200, but an opportunity came up for a boat lift. I was thinking, “Wow, wouldn’t it be nice to reduce my power washing time at the end of the year by keeping the ‘toon on a lift and not floating all season?” The scum build up in our lake (fresh water…ha) gets pretty thick and a lift could reduce that significantly.
In the past, a new lift was more than I wanted to spend. Well, the stars aligned and Mike at our marina gave me a call and had a used lift in a slip and wanted to know if I was interested. He wanted to make a simple, quick deal for the owner. So he says it’s a three-toon lift but will work for mine. Well, that’s exciting news! And who doesn’t think a three-toon lift needs three ‘toons to lift, right? So I’m all about buying a new boat or adding a third ‘toon. Of course the other part to this, is my wife, Jeanne, and that recovering accountant issue; she’s not too excited about buying another new boat right away. We opted for the economical, easy-to-install, weekend add-on, Pontoon Wholesalers’ third pontoon kit.
I’m looking forward to the install and the performance increases I think I will get. Buoyancy, speed, cruise, stability, cornering; it is kind of exciting! I figure a couple of hours with a drill, zip ties and duct tape and the ‘toons will be ready to test.
Another synchronicity is my current slip number is 536 and the new slip with the lift is 635. How cool is that?
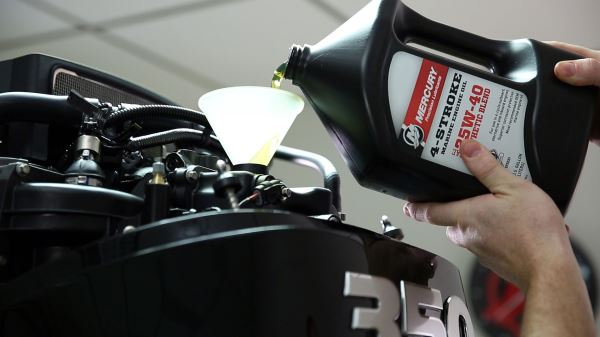
Change Your Own Oil
So anyway, before I install the ‘toons, I need to get the rest of the service done. One of the first things is to change the engine oil. Oil changes can be one of the easiest ways to save a few bucks as a boat owner. How many of you change your oil in the spring? If the boat is stored over the winter, why change the oil in the fall? Save that job for the spring time. If you have a four-cycle outboard it is a pretty simple process (if you still operate a two-cycle engine, then you won’t need to this, of course).
Everyone should know about oil and oil changes. The oil in the engine is used to lubricate all the moving metal engine parts. But it does more than just lubricate; it carries particles of dirt contaminants and heat away from the moving parts. As the oil moves throughout the engine and does all this work, it is sent through a filter to try and collect as much of the sediment and gunk as possible. But oil doesn’t last forever. After a while the chemical make-up of the oil starts to break down. It collects soot, fills up with acids and the oil just doesn’t work like it used to. One major problem is the oil can’t carry the same amount of heat as it did before. That can allow the engine to run at higher temperatures and therefore break the oil down further. It’s time for an oil change. Sure, there are a few oil manufacturers that claim their oils can last hundreds of thousands of miles without breaking down. There are makers of oil additives that are supposed to extend the life of the oil and the time between oil changes, but let’s face the facts. If you have to put additives in the oils to make it last longer, it must be missing something. The old oil needs to be removed, the filter needs changing and new oil installed.
Oil changes are a simple and inexpensive maintenance item that can save lots of money in the long run. Regularly changing the oil keeps the inside of the engine clean, lubricated and running smoothly. It’s also a good time to check for any metal particles in the oil that might indicate a wearing or breakdown in the engine.
Most automobile mechanics recommend changing your oil every 3,000 to 5,000 miles, depending on the use. Sometimes they will even put a time frame on it like every three months. Aircraft owners usually change oil about every 25 to 50 hours of use, or at least every six months. What about boat owners?
Most boats service manuals recommend changing oil every 25 to 50 hours of operation or every six months, depending on how and how much the boat is used. Only four-cycle outboards have a need for oil in the crankcase. Two-cycle engines use oil injectors or oil mixed in the fuel to provide the lubrication.
So how do we do the oil change?
A decision has to be made about how to get the old oil out of the engine and what to do with it once you have it. Many auto supply stores have a drop-off location for used oil. It’s not going to be free, but at least you can get rid of the used stuff safely and legally. Don’t just plan on pouring it in your yard or driveway. That’s a bad thing to do to the environment and worthy of a fine in most states.
A nice thing about oil changes is that you need just a few basic tools and the manufacturer’s service manual. You’ll need a socket or wrench set, possibly an oil filter wrench (if the filter doesn’t have the built-in nut), oil change kit (if you are working on an inboard/outboard and your engine doesn’t have an oil change fitting already installed you will need a pump kit) and of course a container for the used oil disposal. I also like to have a can opener and a magnet so that I can open the oil filter and check for metal fragments. Oh, and you’ll need oil (the amount as required by manufacturer’s service manual), and an oil filter.
Getting the oil out of the engine is a little more difficult on inboard/outboards than just outboards. Most engines have a drain plug on the bottom of the oil pan, but if you remove it, the oil just runs into the bilge area of the boat. This can create an environmental and cosmetic mess.
There are quick drain adapters that can be installed in place of the drain plug. These quick drains can connect to a drain hose that runs out the back of the boat through the transom drain. The valve can be open and closed to control the flow of the oil. This method is definitely better than just draining the oil into the bottom of the boat, but it still has its disadvantages. You have to attach the drain hose and get it through the transom drain, you still need a container for the used oil and it still drips in the bottom of the boat while you are trying to get the hose disconnected. Plus, it is difficult to get under the engine to connect everything and turn on the valve. If you have one of the newer engines, they often come from the factory with a quick drain kit already installed.
But, to do a good oil change, you should run the engine and warm the oil, which means as you are trying to reach under the exhaust manifold and down below the hot crankcase to the oil drain, you’ll have the risk of being burned or at least singed. And there are reported failures of the quick drains that have leaked or opened and drained the engine oil at inopportune times, ruining the engine. But don’t take this as a reason not to use a quick drain kit. Aircraft have been installing quick drains for years with very few problems.
Alternate Means
Numerous companies manufacture oil change kits that siphon or pump the oil out of the engine through the dipstick tube via manual or electric pumps. The economical manual pumps cost from about $20 up to $60. Tempo Products makes a very economical and well-built oil pump. The Oil Boy Fluid Extractor Kit is made from heavy plastic and comes with all the fittings you should need for the majority of boats. The kit includes the garden-hose-sized fittings for the Volvo Penta 4.3 that we drained. The kit also included the small tube to slide in the dipstick drain on the older MerCruiser. Assorted boats, assorted fittings and the Oil Boy are capable of handling all of them.
If you plan on changing the oil while the boat is in the water this is probably going to be the only way to get it done. The pump system extracts the oil from the engine and stores it in the tank of the pump. The pumps are designed with a handle and are transportable so you can haul the oil to a disposal location. You do not want to spill the oil into the water and create a surface slick (and environmental hazard) that everyone at the lake will remember you by.
To drain the oil it needs to be warmed. Logically, it would be best to hook up the flushing system and run the engine for a few minutes or change the oil after you returned to the dock. Do not drain the oil when it is hot, just warm. Warming the oil thins the viscosity and allows the oil to drain from the engine components back into the oil pan. Additionally, since these pumps draw the oil through the dipstick tube, you can image that the tube is very small. The oil needs to be thinned for the pump to draw it through the tube. Many of the pump kits are made from a plastic and if the oil is too hot, it will melt the container and pump.
After the oil is warmed, remove the oil filler cap, usually located on top of one of the valve covers. Remove the dipstick, insert the tube per the manufacturer’s instructions and start pumping.
On four-cycle outboards, use the manufacturer’s service guidelines to locate the lower drain plug. Make sure you have a way to catch the used oil in a reclamation container. You can use the Oil Boy Fluid Extractor Kit and remove the oil through the dipstick tube as on an inboard. Or you can remove the drain plug and open the oil filler cap. Let the old oil drain from the engine per the manufacturer’s recommended procedures.
Final Steps
After the old oil is removed, but before the new oil is installed, you will need to replace the oil filter. Most filters are of the screw-on variety. That means they look kind of like a metal can, with a threaded fitting on one end. They are filled with a paper material that allows the oil to pass through the paper, but stops and collects any small particles in the folds of the paper. The filters are usually just a little too tight to get off by hand; that’s where the filter wrench comes in handy. A few filters have a nut shape built onto the top of the filter. If the filter has that, all you need is a ratchet and socket or an open-end wrench of the same size.
If the filter is smooth on the top, use the “band” style wrench to remove it. The band style has a handle and a metal chain or rubber “band” that is attached to the end of the handle. There is a small section of the handle that moves and loosens the band so that it will fit over the filter. After the belt is slipped over the filter, move the lever in the direction to loosen the filter, (typically counter clockwise, or to the left) and the band tightens around the filters (the metal housing) and grips the filter allowing it to unscrew. The filter will still have a little oil in it. Filters will not usually drain completely out when you drain the oil because they hang sideways (or upside down below the engine case) so be careful to remove it without tipping it over and spilling used oil all over the inside of the boat or on the ground.
Drain the filter through a funnel into the waste oil container. While the filter is draining, reverse the procedure to install the new filter. Filters should be inspected to make sure they are not damaged before installation. There is an o-ring or flat gasket that seals the outside edge of the filter against the engines case. Make sure you put a light film of high temperature grease on this o-ring so it doesn’t dry out, stick and become damaged while installing. If you do not have any grease you can use a coating of oil, but it doesn’t last as long as the grease does.
Install the filter finger tight. Screw the filter in place as tight as possible by hand and then reverse the direction of the filter wrench and give it about a ½ to ¾ turn more.
Once the filter is installed you can add the new oil. If you bought quart containers of oil, open one at a time and start pouring them into the oil fill opening. After filling the engine with the manufacturer’s recommended amount of oil, insert the dipstick firmly in place, remove, and read the oil level.
Heavy Metal
If you are interested in what the inside of the filter looks like, now comes the fun. With the can opener (an old one) cut the end of the filter off that has the screw-in threads. After the end is removed, you will want to slide the paper filter out slowly so that you can see what type of particles are trapped in the paper filter. Unroll the filter on a flat surface. You can always put newspaper under it to help collect the oil. Pass the magnet over the paper and see if it picks up any pieces of metal. An experienced mechanic would be able to tell you where the metal was from. Certain types of material and shapes would indicate wear on a certain part of the engine. For example, larger shards of ferrous metal (that the magnet picks up) are probably from the crank or the camshaft. Smaller fragments, more like pepper of non-ferrous metal would probably indicate wear on the bushings.
If you find any larger pieces of metal or foreign material in the filter or in your oil, take it to a mechanic. Any signs of wear or deterioration need to be checked out by a professional. Inspecting the engine now could not only save you from getting stuck on the lake but also in overhaul costs.
If this all sounds too like much, just take it to a qualified boat shop or get a good mechanic to change the oil.