As I mentioned before, even though I am an evangelist for buying simple and practical, I do succumb to the excitement of improving my ‘toon’s ride and increasing the performance just like any other TGH (‘toon gear head). And in this case I decided to add a Pontoon Wholesalers Poly 3rd Tube Kit and see what happens.
First I have to say that Mike and Troy put together a great package. When I first saw the unit at the Pontoon and Deck Boat Days event a couple years ago, I was interested. It took me two years to get serious about it, but now I have one and I can say that so far it has met my expectations.
If I had my way, it would be a third ‘toon AND a new 115 horsepower engine mounted on the back of my 20-foot Bentley…but my boat partner (spouse) said I had to wait a bit for that power upgrade. Apparently she thinks we should do the comparison test based on the 60 horsepower I have now. Sometimes common sense just gets in the way of horsepower upgrades, or is it the accountant in her? Anyway, there is just something that says to me that three ‘toons need more horsepower. Maybe next year (or just between you and me…next month).
The kit was delivered in four big cardboard boxes filled with the ‘toon segments and two long aluminum channels. It arrived when the weather started to get cold and I opted for waiting until we could install the kit outside.
A friend offered his building to use, but my goal was to put the third ‘toon on in a manner that an average do-it-yourselfer would and could do.
In my mind that was outside in my drive (or yard) on the trailer. If this kit is designed to help me improve that older boat I already own or upgrade an entry-level boat I already have for very little expense, I don’t want to rent a shop or lift or hire a mechanic. I need to be able to do the install with what I have. I also like to stumble through things on my own. Even though the install is pretty straightforward, it is well worth going to Pontoon Wholesalers’ website (www.pontoonwholesalers.com/) and looking at the instructions about the installation. I’m not saying I used the instructions or anything!
The installation only takes a few basic tools and a little manual labor to complete. Guess I shouldn’t have been surprised when Mike said it would only take about four hours for the job. I had my doubts, but in reality it can be installed in a remarkably short amount of time. We planned on a weekend so we would have time to make mistakes and capture the fun and excitement on video, which we did. It didn’t take near as long as I expected. The next one I think I can do in about four hours or even less.
As I have said before, my free video advice is, if you want a professional video you hire a professional crew. If not, you get us.
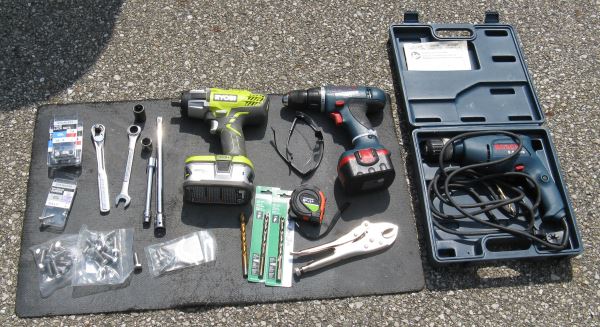
So let me go over the basics. You will need a good drill and 3/8-inch drill bit for mounting the two aluminum extruded J-Channel channels, called the “Toon-Trac Mounting System,” to the bottom cross beams of your pontoon. I used a regular corded drill instead of my usual Ryobi cordless drill thinking I might need more duration. But in the end I think we could have used a cordless as long as we could swap out batteries. I also invested in a brand new drill bit to start fresh.
Also in my situation I used a Ryobi cordless impact wrench to install the nuts and bolts. But you can use a ratchet, socket and box end wrench if you want. You don’t need an impact wrench but it sure did simplify the process. Okay, I went out and bought a Ryobi cordless impact wrench just so I could use it for this project. Okay, yes I just wanted a reason to have a Ryobi cordless impact wrench. Did I mention I am a fan of Ryobi 18 volt cordless tools?
You will also need a few C-clamps or locking pliers to hold the J-channel in place while you drill the mounting holes. Additionally you will also need a tape measure and marker (Sharpies work the best) for marking the location to clamp the J-channels. We also needed a metal cutoff tool to remove a small section of metal for more clearance of the rear tube but not everyone will need that. As normal, with any type of install each boat will be unique.
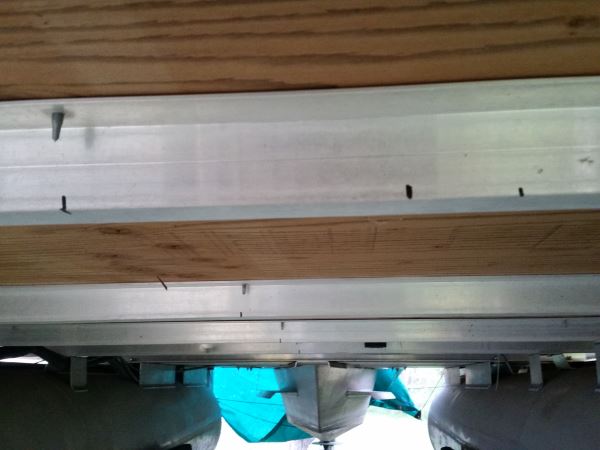
The tracks are installed with 3/8 x 1-inch stainless bolts and nylon insert lock nuts in the C-channel cross beams on the boat. On the closed U-channels you will need to use self-tapping stainless screws. If your toon is under-skinned you’ll need to use self-tapping screws for all the channels, but I would use nuts and bolts at least on the front and back of each J-channel if at all possible. I think the bolts give it a little more security than just self-tapping screws. Being under-skinned I think puts you at a little bit of a disadvantage because you are kind of working “blind” when drilling and installing into the cross channels on your boat.
We started by marking the cross channel center line from the motor pod to the front deck edge as a reference. Pontoon Wholesalers had already cut the J-channels based on preliminary measurement from our boat, so all we needed to do is get the channels lined up the right distance apart from the center line to slide the tube sections in place. Take your time doing the measurements. Remember the old line, “measure twice, drill once.” You need to measure the “channel” location itself and then compensate for the flanges that you drill through. Since the required channel width for the tube sections is about 15 inches, that will make the outer edges of the flanges about 19 inches apart, so you have to make a few calculations as to where to mark the cross beam at the outside of the J-channel.
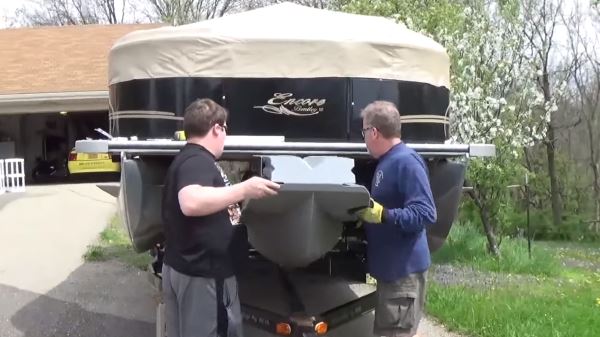
Oh, I forgot a major item, when you are doing the install on the trailer, you’ll need to remove the winch stand to have room to put the tubes in the channel, which is just another reason to have a Ryobi cordless impact wrench!
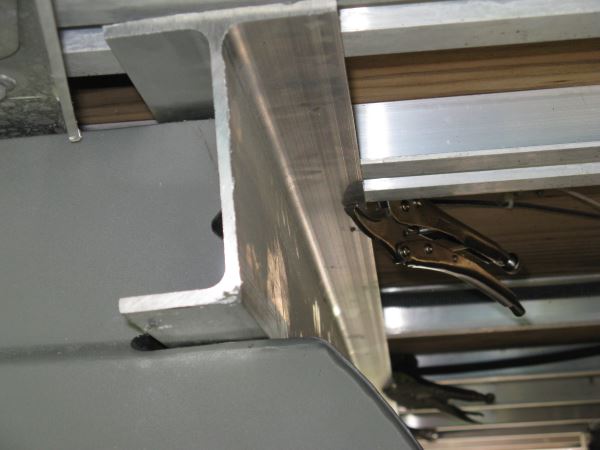
We used locking pliers (vise grips) to hold the J-channels in place on the bottom of the toon. That sounds easy enough, that is, until I was actually under the boat trying to hold up my end of 15 feet of J-channel aluminum with one arm and manipulating adjustable locking pliers with my free hand to hold the channel in place on the marks. Apparently the kettlebell squats I am doing occasionally are not building the muscle fast enough. And after it was all done, I was wondering why my son wasn’t doing the difficult end instead of me.
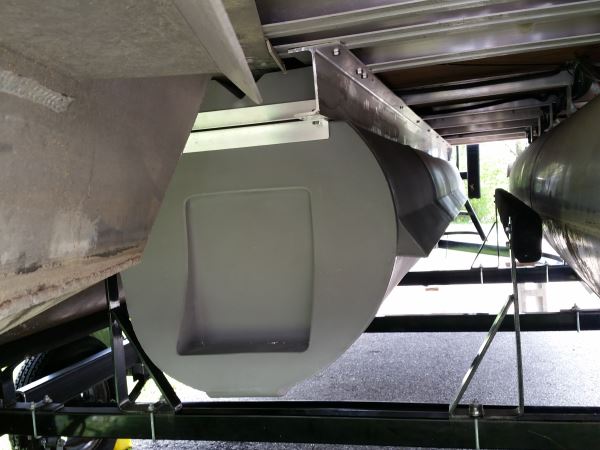
After a couple of minor relocations, the J-channels were clamped in place and we did a preliminary installation of the tubes to make sure we had it correctly mounted. Our motor pod actually had a forward mounting plate that needed to be slightly modified (can you say “metal cut off wheel”?) to allow the rear tube to go back far enough. We did think about leaving the tubes further forward, but decided not to. I’m not sure if it would have made a difference, since it was only about five inches. The goal was to get the front panel aligned with the front of the deck so we made a few minor adjustments before we started the drilling. Both J-channels need to be even at the front of the boat so the retainer plate looks square to the deck.
Before starting the drilling we removed the four tube sections and put them in the drive beside the boat. This is a key thing to remember and a factor in why it took me an extra day to install the kit.
The next step was nothing more than manual labor (and safety equipment). I plugged in my drill, donned my safety glasses, noise protection ear muffs and gloves and started to drill. Minor extension cord tip: I always tie the ends of my cords (the drill and extension) in kind of a square knot before starting. This keeps the cords from uncoupling while I’m under the boat dragging the cords around. I don’t know how many times I have been pulling the cords and things came unplugged, and then I had to climb out and re-plug things. A simple knot helps stop that problem.
I started drilling one hole in the rear of each channel first and installing a nut and bolt in each J-channel at the rear. Then we moved to the front location and did the same. I tightened those four nuts and bolts and then we reinstalled one of the tube sections and pushed it from the front of the J-channel to the rear to make sure we had everything aligned and we were able to get the tubes in the channels as designed. One reason this was important for us is because we wanted to run a few performance tests with the third toon installed, and then while at the lake, remove the toon and do the same tests.
After all the holes were drilled and the nuts and bolts installed I was able to use my new Ryobi cordless impact wrench and a combination wrench to tighten all the bolts. At the few locations that needed self-tapping screws I drilled small pilot holes to make the installation go a bit easier. I used my corded drill with a nut driver to install the self-tapping screws.
After the J-channels were installed we reinstalled the tube sections. This is where the comment “leaving them in the drive” becomes important. I didn’t give any thought to leaving the sections sitting in the sun. But I should have. When we tried to reinstall the tube segments into the J-channel…we had an unexpected surprise: physics. Apparently the sun warming the tube sections caused the air inside to expand and they swelled up enough that we could not get them back in the J-channels. I can remember being one of those in physics class thinking “when will I ever use this stuff in real life?” Well, who would have thought that physics was kicking my butt in a pontoon installation?
So, plan ahead and do not leave the toon sections in the sun. My work day ended with putting the sections back in the garage, in the shade, to let them cool overnight. That’s why it took me two days instead of the estimated four hours to install.
The next day we were able to install all four sections of the tube. One tube was still oversized slightly and we had trouble pushing the sections together. If you look at the video and the pictures the middle sections have interlocking areas on the front and rear that keep them connected. One section would not fit easily into the other section. We ended up having to use a bit of “persuasion” to get all the tubes together.
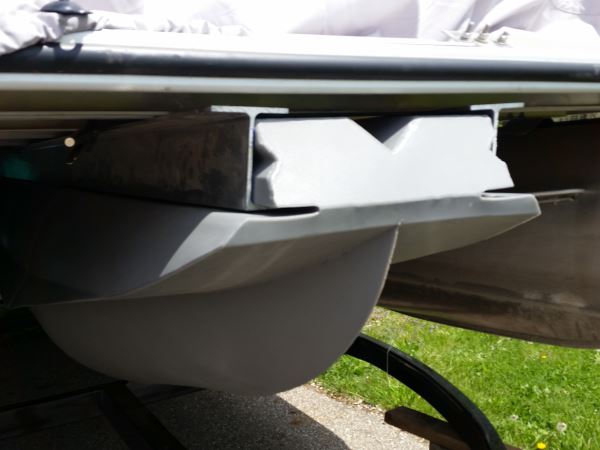
To persuade the tubes, we connected four ratcheting tie down straps together, hooked one end to the front eye on the port toon, then wrapped the strap behind the third toon and around the front of the third toon and then back out to the starboard toon’s front eye. Sound confusing? Hopefully the picture will give you an idea. All I was doing was using the ratcheting strap to squeeze the sections together, which happened pretty easily. Once the sections were in place we clamped and drilled the front retaining plate at the location we wanted and pushed the third toon forward as much a possible.
At the rear of the toon we installed a piece of aluminum angle with a couple of extra 3/8 x 1-inch stainless bolts and lock nuts to keep the toon from sliding backwards.
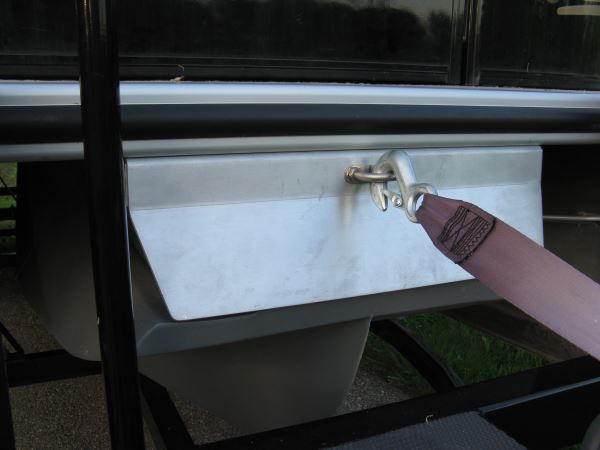
All that was left was installing the front retaining plate with a couple more of the 3/8 x 1-inch stainless bolts and…uh oh, where am I going to put the eye for the winch strap? Luckily the top of the poly tube has a V-section. So I was able to mark the front retainer plate and install the U-bolt directly in the plate with the nuts in the V-section of the tube. I didn’t think the retainer plate by itself was going to be strong enough so I got an extra piece of 1 ½-inch aluminum angle (¼ inch thick and 19 inches long) and mounted it behind the retainer plate as reinforcement.
That’s it, done, installed, ready to go. So next is the testing. Stay “tooned” for the test results of adding a Pontoon Wholesalers Poly 3rd Tube Kit to my boat.